

Table of contents
Some Context
Have you ever faced the issue of missing some changes in a commit, creating more commits and then realizing your mistake? I have.

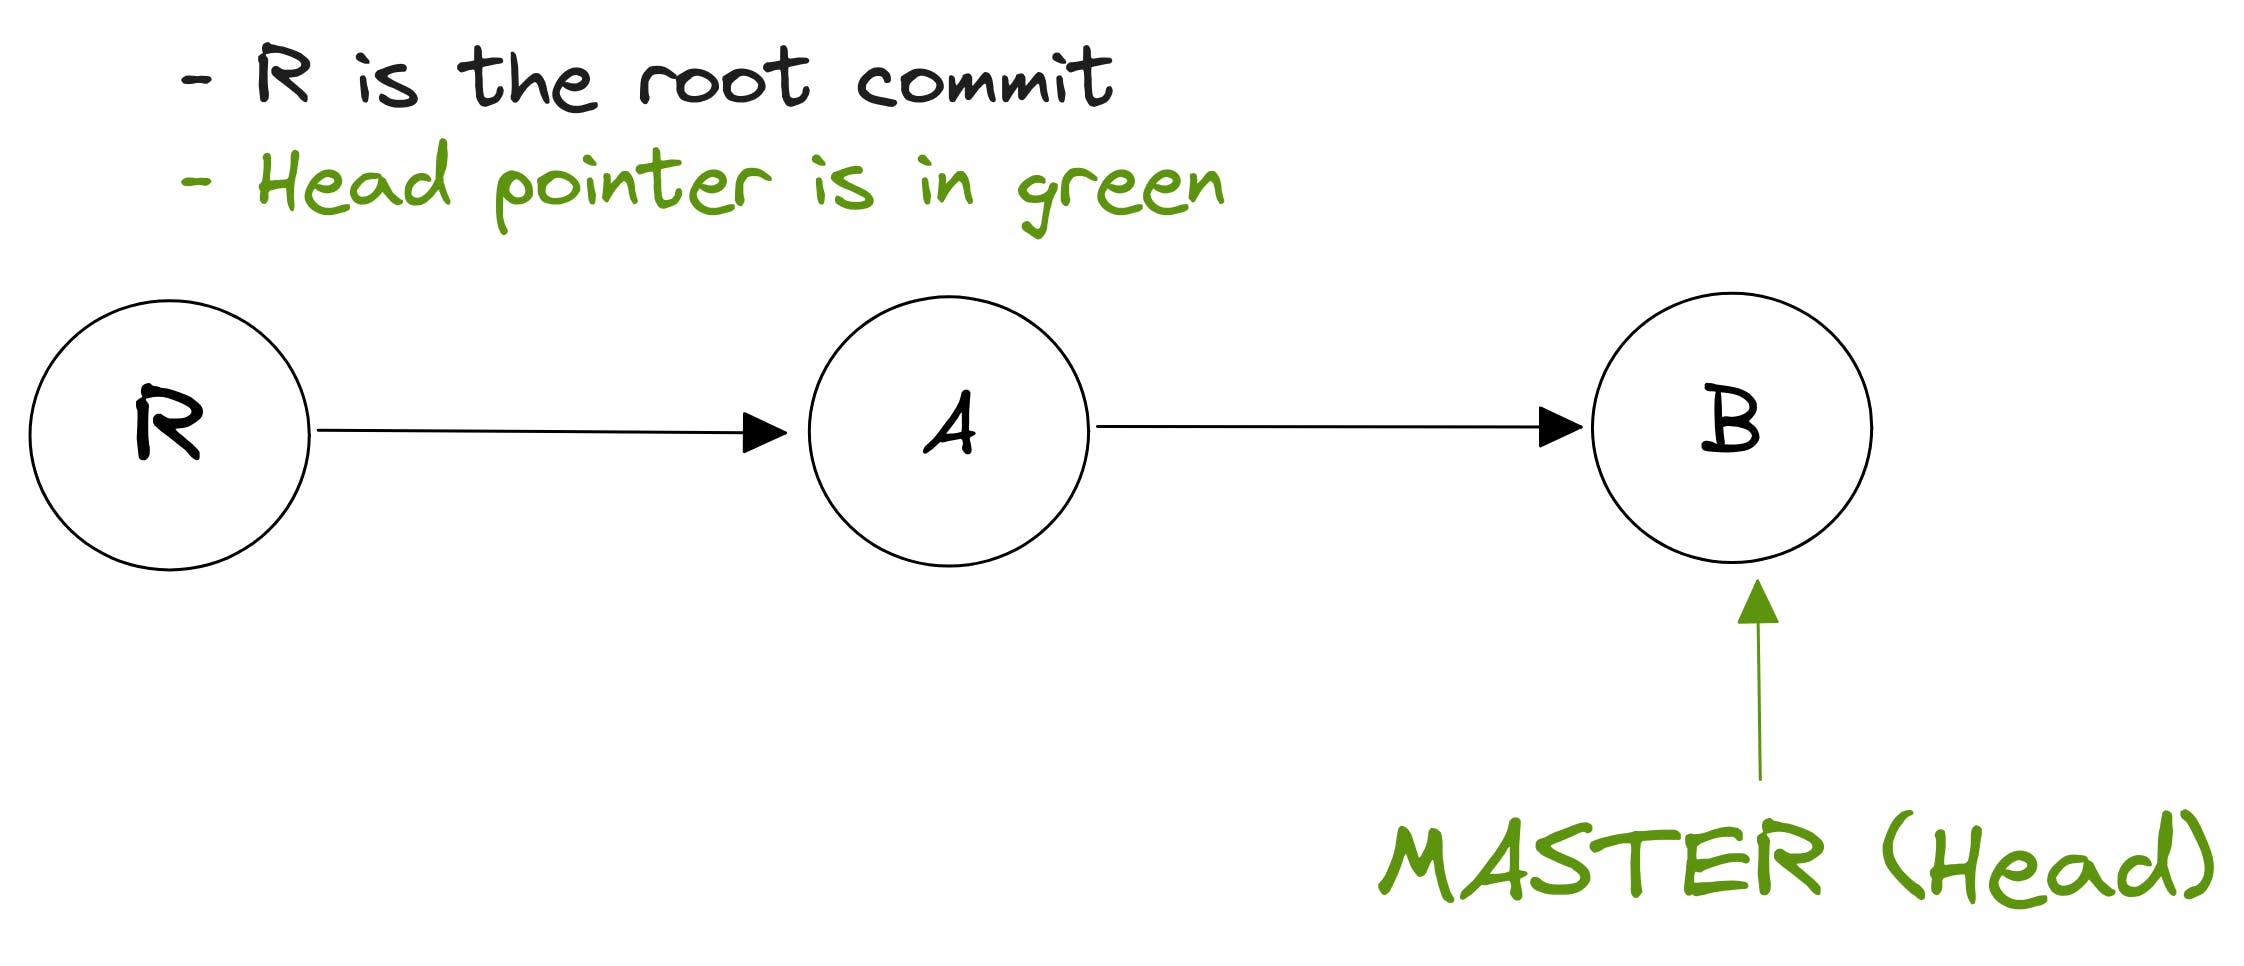
R is the root commit of this repository
A is the commit where I missed including some changes
B is the commit created on top of A, and is at the tip of the master branch.
Even if you haven't, I believe working with git in a more involved way instead of just commits, pulls and pushes is extremely important if you're used to working on projects by yourself.
This attitude towards Git may help to prepare you for collaborating with other developers.
In this article, I make the assumption that you are familiar with basic git commands. Feel free to refer this cheat sheet to brush up.
Basic Setup for a Demo
For the purpose of demonstration, I'll be making changes to and committing a text file called file.txt.
Here is the initial set of git commands:

As well as the initial contents of file.txt.
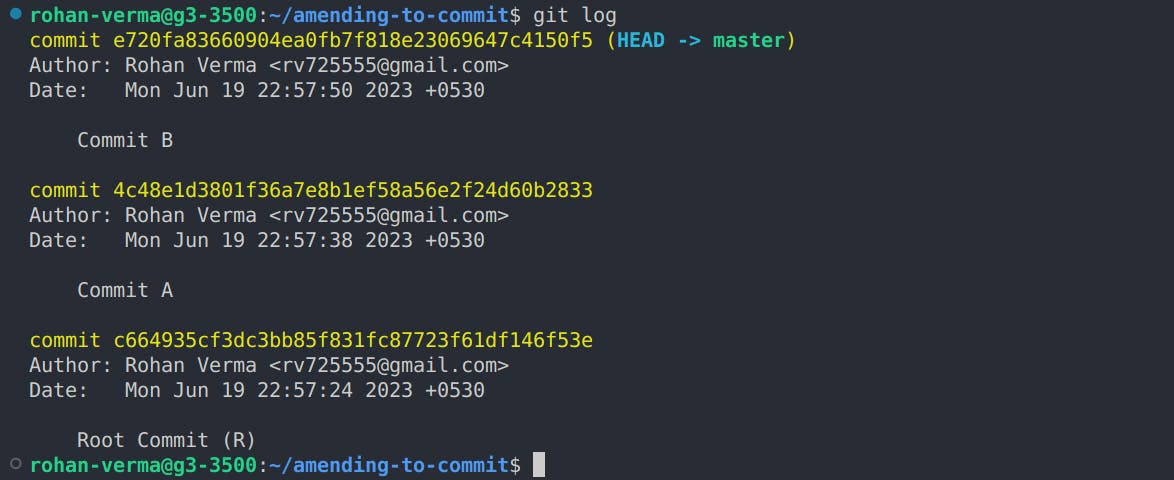
Root Commit (R)
Commit A
Commit B
Here is an illustration of the commit graph for better understanding:
A Dog?
Before we dive into the core of this article, let's take a moment to uncover a powerful command that can greatly enhance your Git experience. It's not just a neat trick, but a valuable tool you can use every day.
You may already be familiar with git log, but chances are you haven't tapped into its full potential.
git log 🥱
This is what most people typically use when they starting using Git.
git log --all --decorate --oneline --graph 🐕
However, when you truly want to comprehend your commit graph in a meaningful and efficient way, there's a version of git log that shines above the rest.

Observe how this command presents a cleaner and more readable commit graph.
Allow me to explain its components:
--all: Reveals the commit history of all branches, incorporating commits from every branch.--decorate: Enhances the commit output by displaying branch and tag names, aiding in the visualization of associated branches or tags.--oneline: Condenses each commit to a concise one-line representation, showcasing the commit hash and message.--graph: Renders a text-based graph representation of the commit history, illustrating branching and merging with clarity.
And if the technical explanation isn't your cup of tea, let's simplify it with a meme:

The Problem
Oh no! I wanted to add some other changes to Commit A. But, I've already made Commit B after it.
Technically, I could add another commit for these changes, but we should always strive to have a clean commit history.
The Solution
Here's how this issue can be resolved...
1. Checkout Commit A
We wish to add some more changes to Commit A, so why don't we checkout to it first?
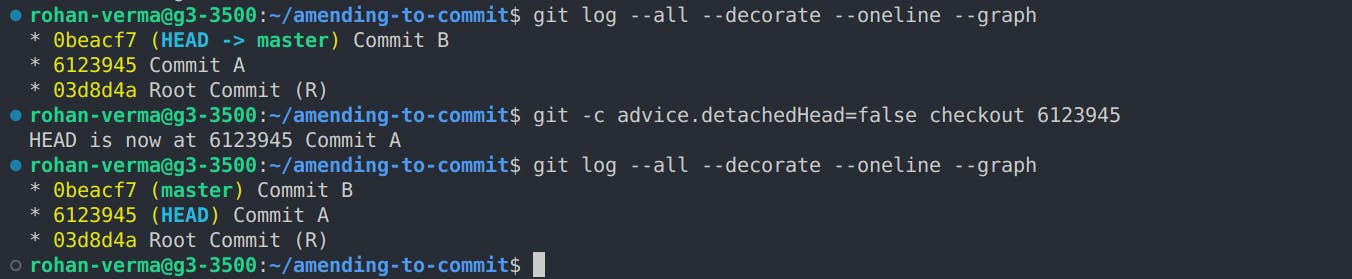
As evident from the git log, the HEAD is now at Commit A .
Note:
-c advice.detachedHead=falseflag is used in Git to disable the "detached HEAD" warning message.

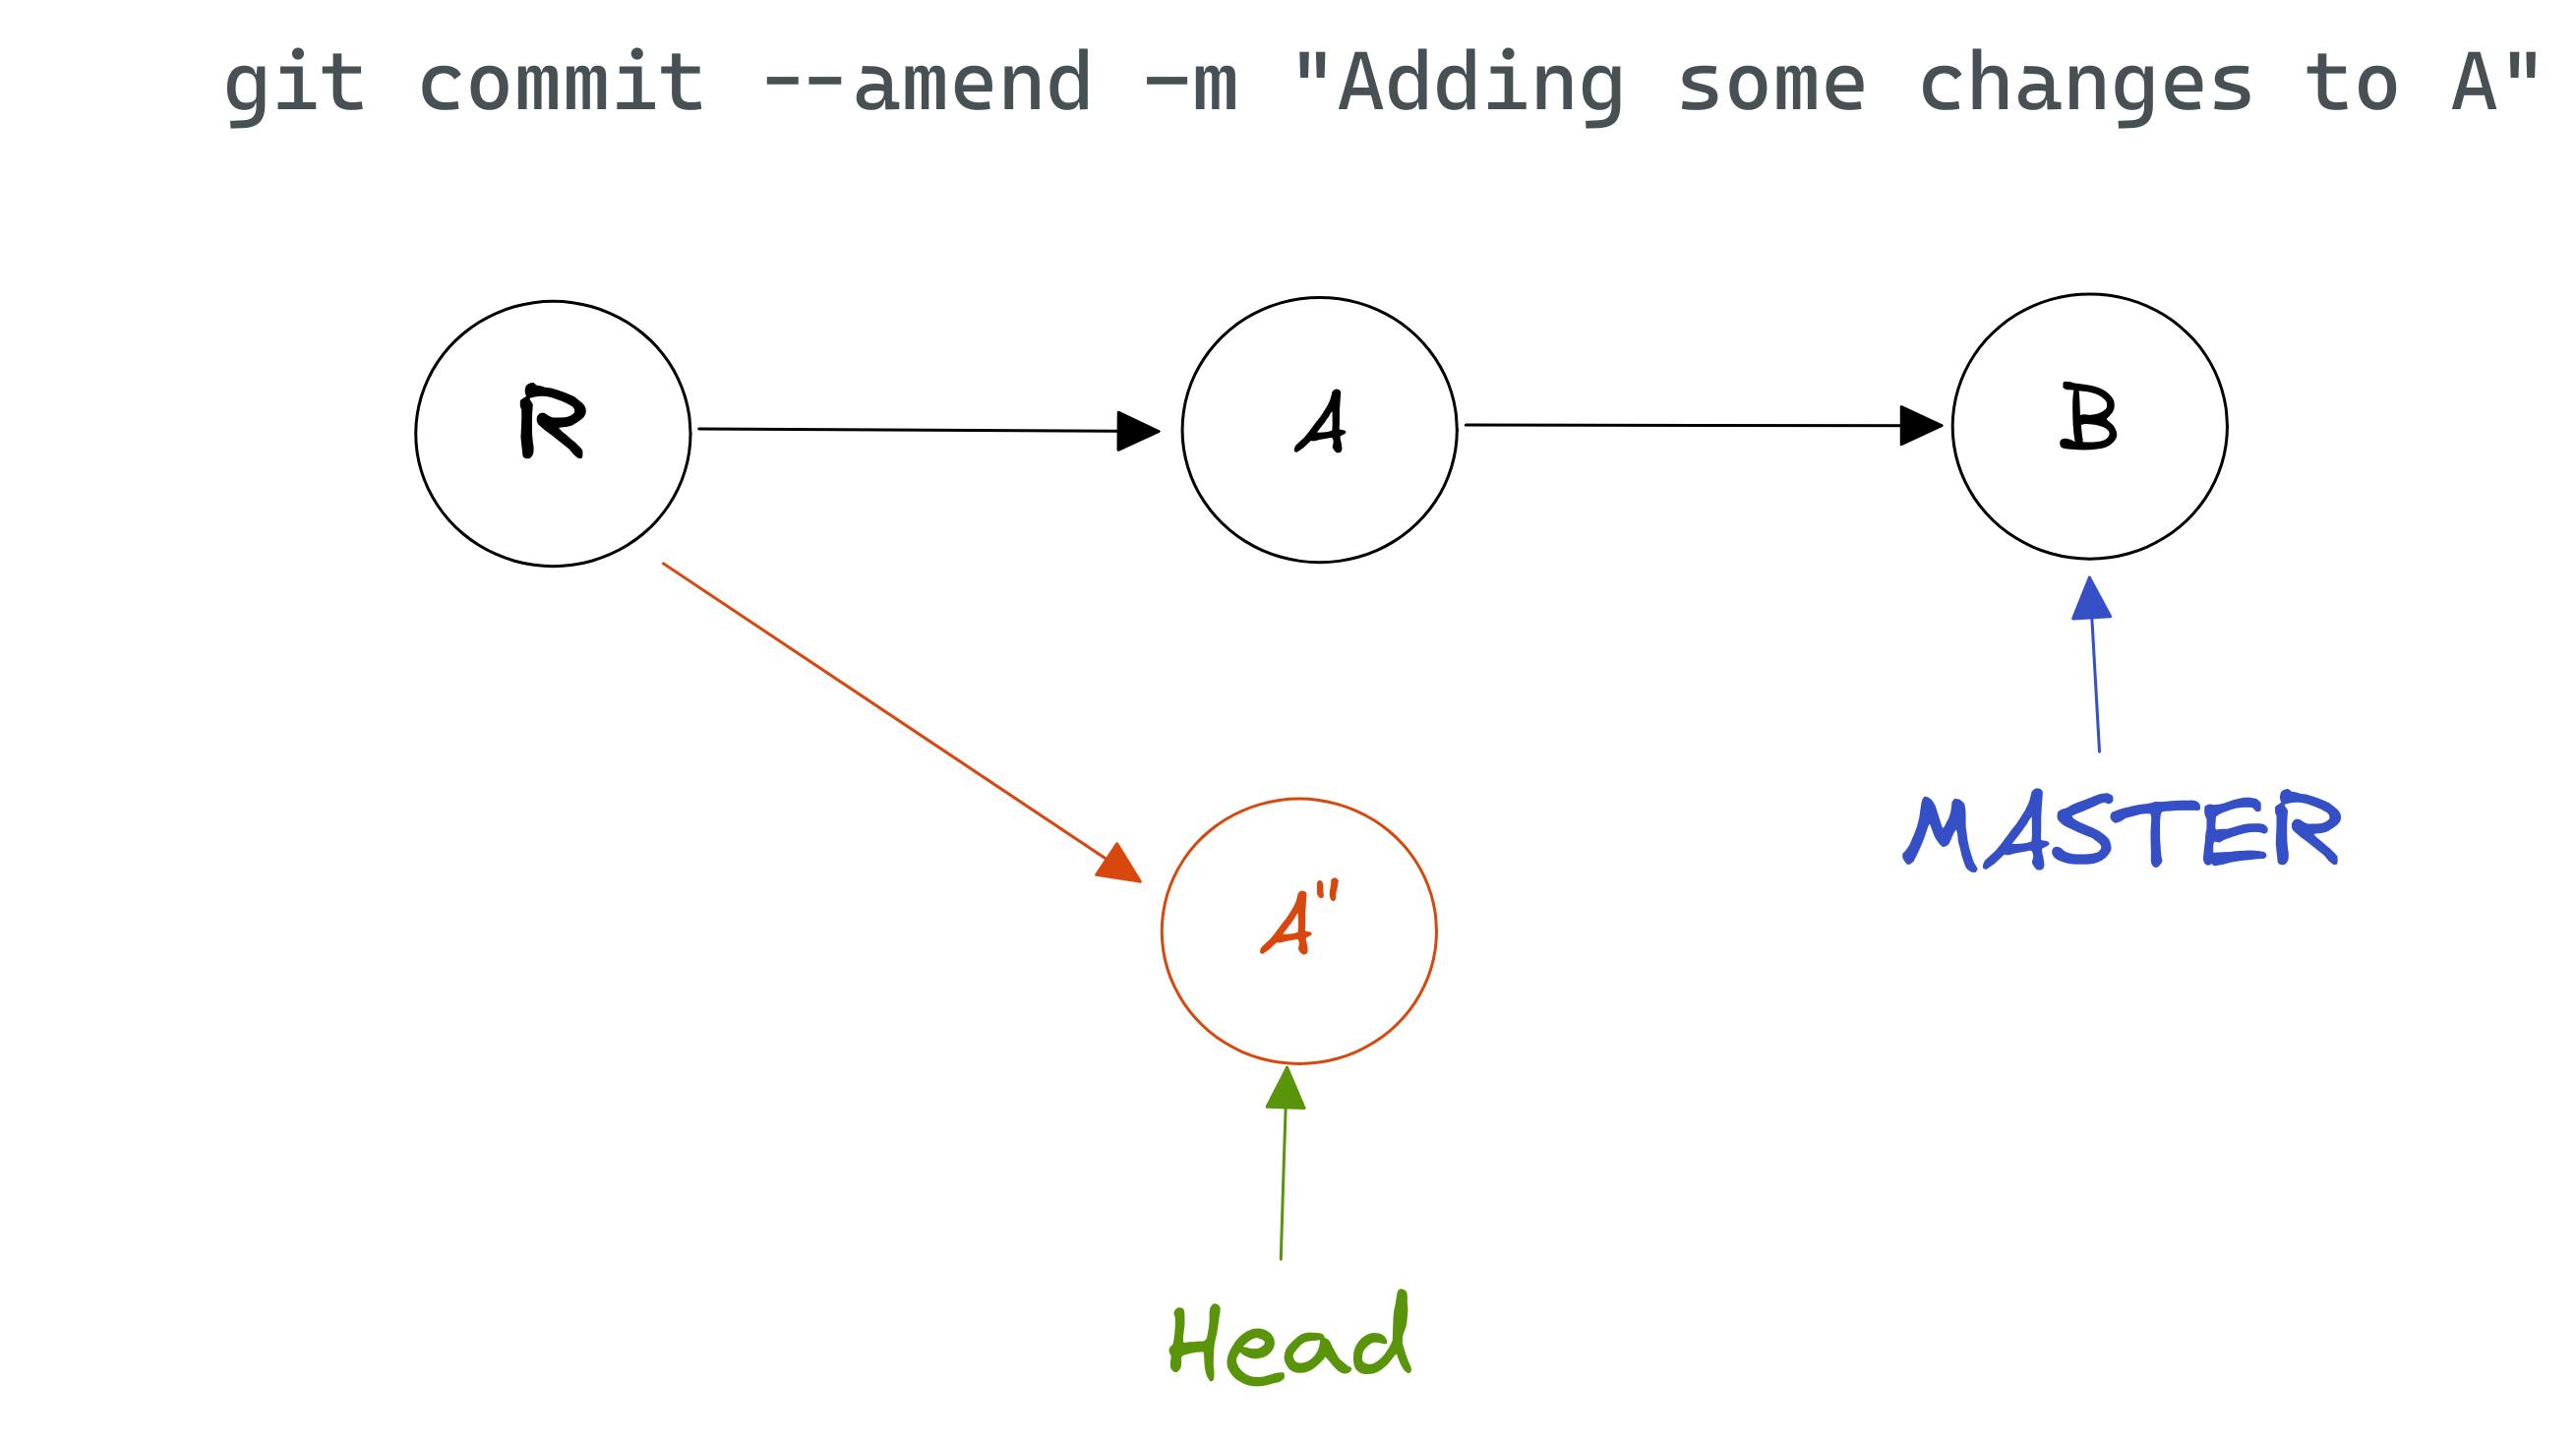
2. Use --amend as usual
Now, we stage and amend the changes that need to be added in Commit A.
But, you'll notice something weird happening.
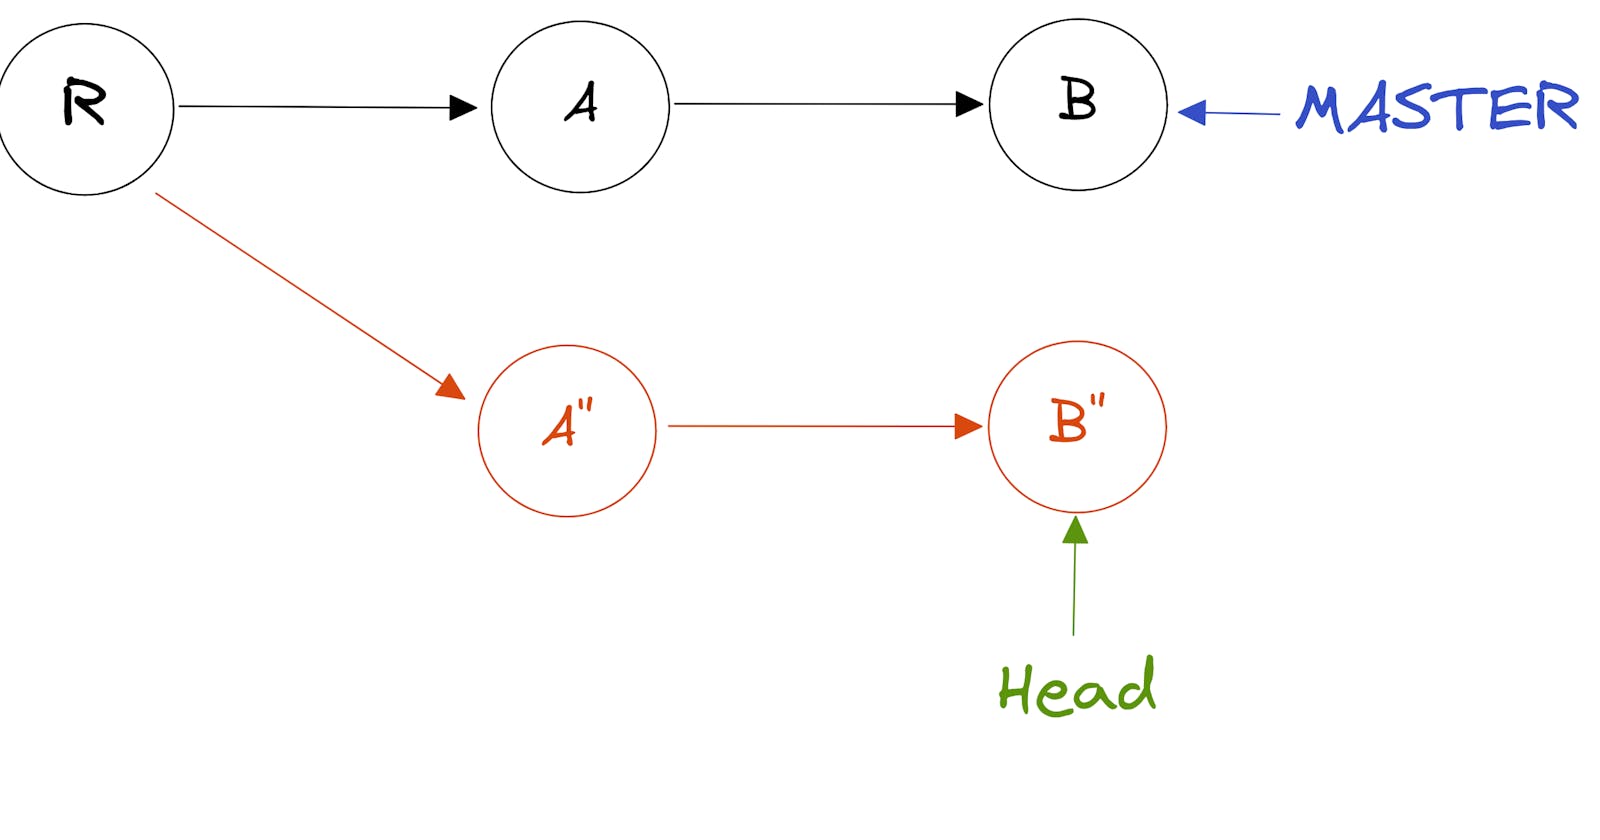
A new commit (let us call it Commit A" ) is created, which contains the original changes as well as the new changes added. However, it originates from the parent commit of Commit A, which is the root commit R.

3. Use cherry-pick to make commit history linear again
Now, to make our history linear again, we will introduce changes of Commit B on top of Commit A''. Observe that our HEAD pointer is currently detached i.e., not pointing to the tip of a named branch but directly to a specific commit.
This can be achieved by cherry-picking, which involves introducing the changes of a particular commit onto the commit currently pointed to by the HEAD pointer.
a. Cherrypicking Commit B
We can make use of the cherry-pick command in git, as so:
git cherry-pick <commit-sha-of-B>
If you're lucky, this will result in a new commit being created directly.
If you're not, it will result in a merge conflict :) (Nooooooooo!!!!).

This is something to be expected because it is possible that the changes you amended conflict with the changes made in later commits.
b. Resolve merge conflicts if any and commit
In my case, there were some merge conflicts, so I resolved them manually and created a merge commit.
Before resolution:
Root Commit (R)
<<<<<<< HEAD
Commit A``
=======
Commit A
Commit B
>>>>>>> 0beacf7 (Commit B)
After resolution:
Root Commit (R)
Commit A``
Commit B


Note: Make sure all commits after
Ahave been cherry-picked ontoA''. Not doing so will result in lost work :(
4. Force delete the master branch
Force delete the master branch once all commits following Commit A have been cherry-picked, which would mean all unmerged changes from master have been introduced onto our new unnamed branch.
In our example, this will lead to us losing the commits A and B, but this was intended.


5. Name the new branch master
After deleting the old master branch, we can name the current unnamed branch as master , resulting in a perfectly linear commit history in our scenario.
This can be done using the checkout command in git, accompanied by the -b flag, followed by the branch name...

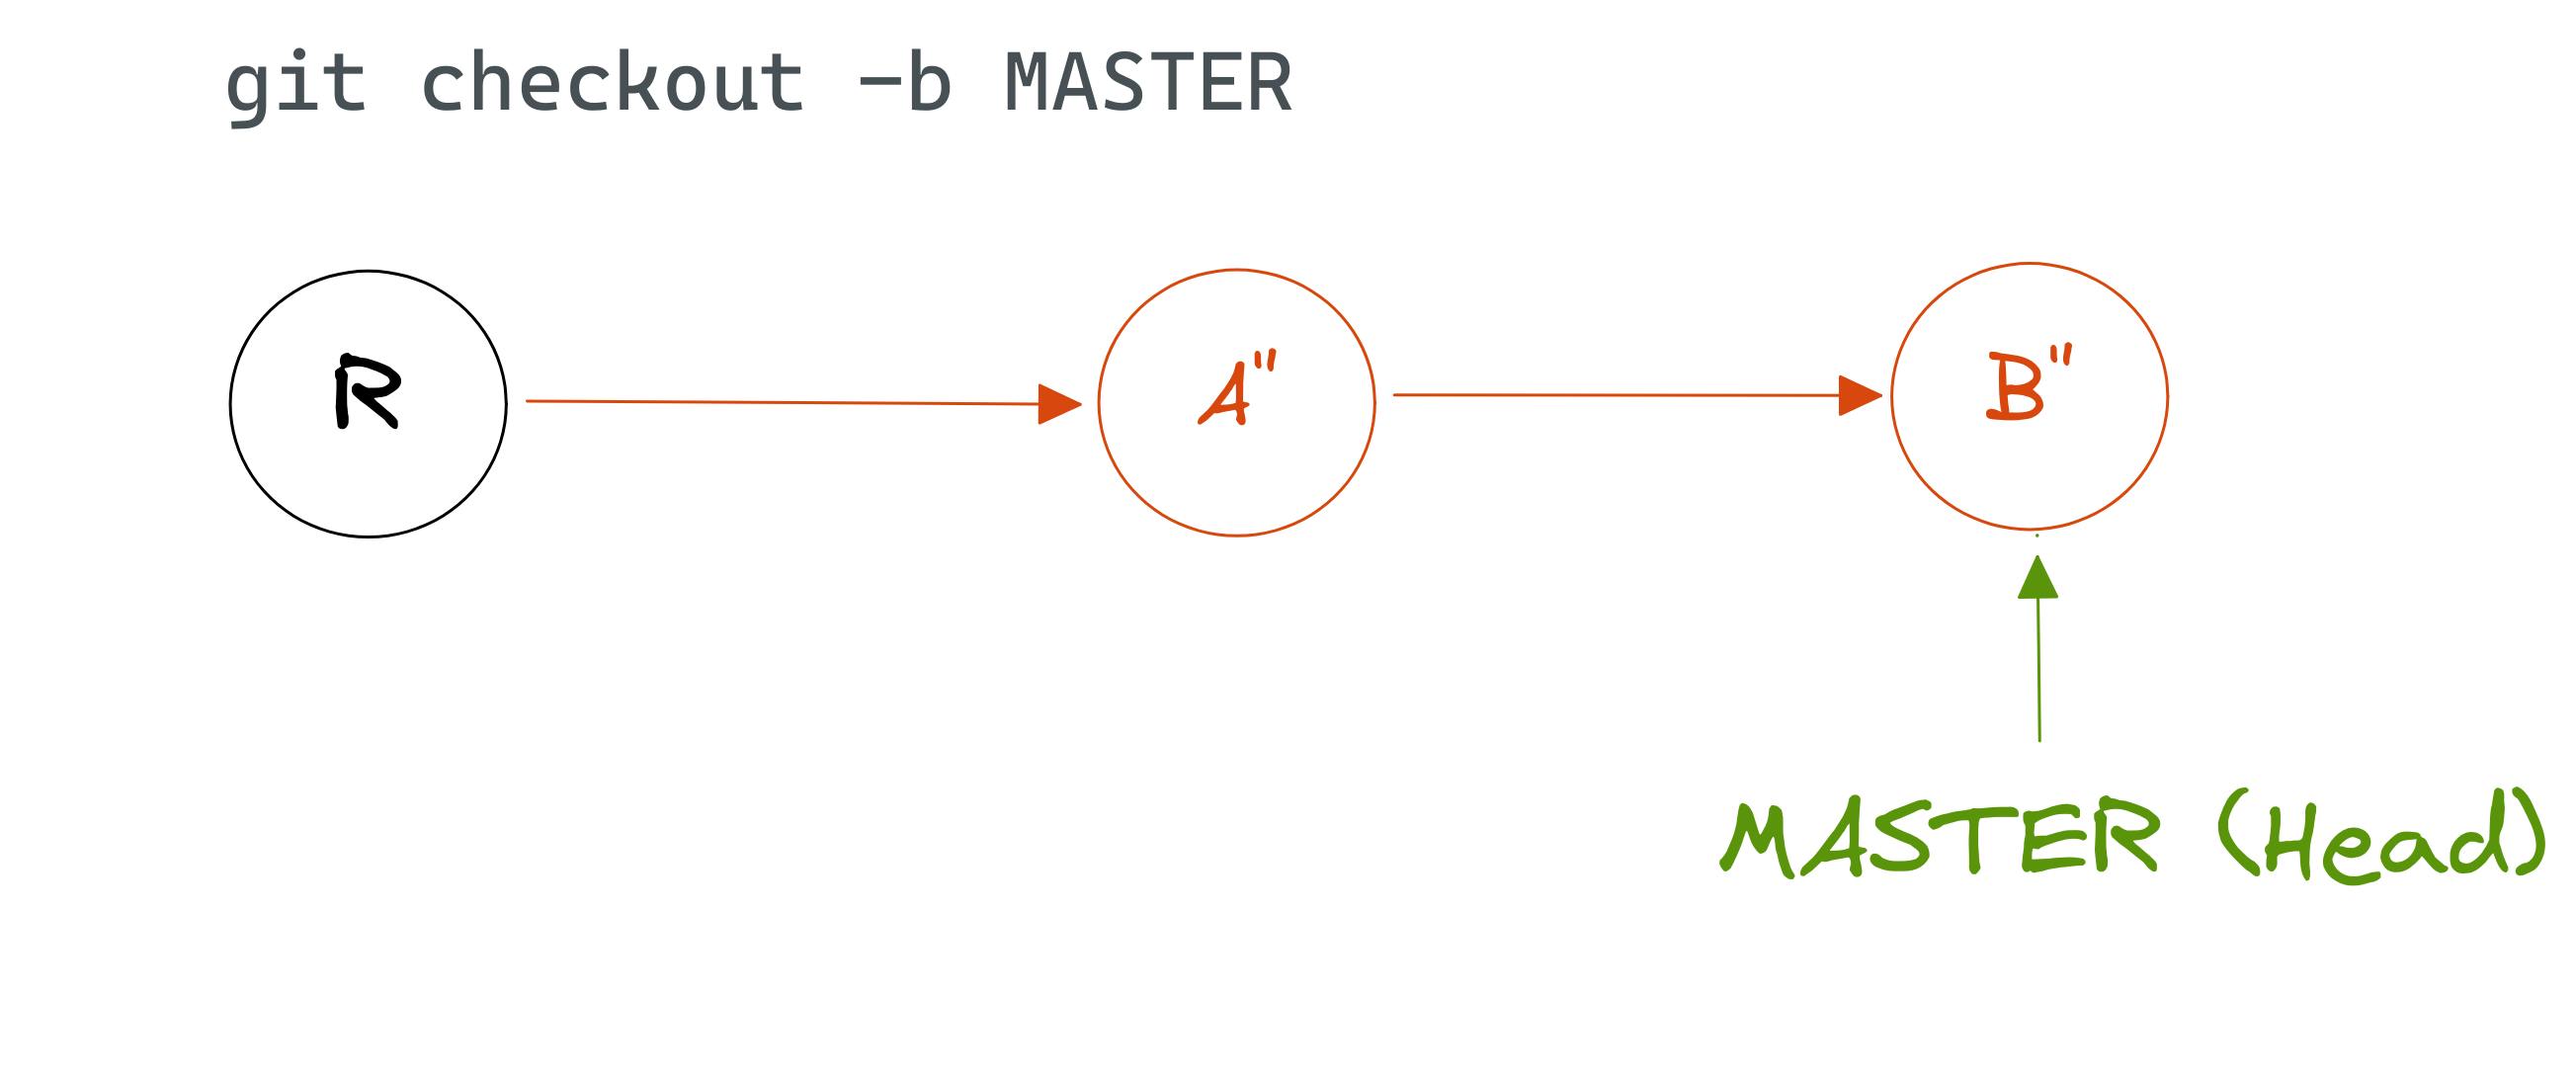
With that, we have successfully made changes to a commit in the middle of our commit history.
And that's it
In addition to the approach discussed in this article, an alternative method to achieve a similar outcome is through rebasing, where the base of a branch is set to start from the head of another branch.
However, the technique demonstrated in this article offers a more intuitive understanding for those new to Git.
By exploring and experimenting with Git, you can gain hands-on experience and become more proficient in handling various scenarios. Emulating different situations provides an enjoyable and effective way to enhance your comfort level with Git.
Remember, continuous practice and exploration will contribute to your growth as a developer.
Thank you for reading!